av-en-pipe 170 / 199
10秒後にBOOKのページに移動します
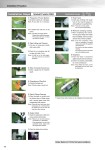
168 Installation Steps Socket Fusion R63 ① Preparation of Fusion Machine 1) Set fusion machine on a flat place. Notes: Fix to a table, etc., if necessary. 2) Fix heater face and turn on the power. Notes:・ No biting of foreign objects. ・ Tighten firmly without looseness. ・ The power will turn on when the cable is inserted. ② Pipe Cutting and Cleaning 1) Cut pipe at necessary length with a pipe cutter. 2) Check for no scratches and dirt on pipe and clean, if any. Notes: It shall be cut at right-angle. Cut and remove any harmful scratches. ③ Entry of Insertion Amount Line 1) Enter a gauge line for insertion depth. ④ Chamfering of Pipe End 1) Chamfer the pipe end. Notes: Chamfer using a special tool. ⑤ Pipe & Fittings Cleaning 1) Clean the pipe cut surface and the internal face of fitting socket with a special paper towel fully impregnated with acetone. Notes: Clean with bare hands and check that grease, etc. is removed from the fused face. Do not touch the fused face after cleaning. ⑥ Heater Check 1) Check the temperature is 260±10「ェC using a surface thermometer. Notes:・ Measure at several locations and check for no fluctuation. ・ If the temperature is out of the specified range, adjust with the temperature selector. 2) Clean the heater face surface. ⑦ Heat Fusion 1) Insert pipe & fittings into heater face to the insertion gauge line and heat/fuse for specified time. Notes:・ Insert at a certain speed. ・ Do not insert while twisting. ⑧ Removal, Crimping, Cooling 1) After completing heat fusion, remove pipe & fittings from heater face immediately, insert it by hand, and then hold it in that condition. Notes:・ Time from completion of heat fusion to completion of crimping shall be done within the specified conversion time. ・ Do not pull or twist after completing crimping. ・ Do not apply any load on the fused part until completely cooled. ⑨ Inspection 1) Check that bead is consistently applied along the entire circumference. 2) Check for no scratches, abnormalities, etc. on the connected part. Notes: If any defects are seen, cut the connected part and redo from the beginning. ↑ Heater faces with 2 sizes can be installed at the same time. (Reference) Notes: Refer to P.172 for the fusion conditions. Applicable Range 15 . 50 mm (d20 . d63) Installation Procedure